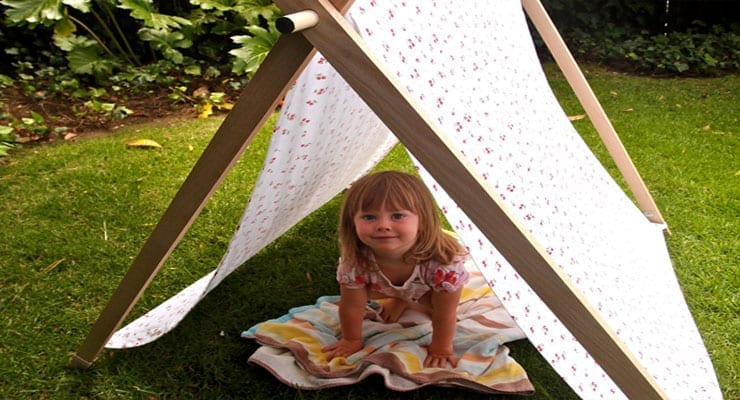
Well, I am certainly not the original inventor of the A-Frame Play Tent, but mine certainty is cute, isn’t it!?
If you search “Play tent” on Etsy, you can find several versions of this adorable little tent are available for you to buy. Or, just make your own!
Super simple. And, your kids will adore you!
Supplies
- 4 – 48″ x 1 1/2″ pieces of molding. Available already cut for you at the hardware store. I used redwood, but whitewood or poplar would be great too.
- 1 3/4″ x 48″ Dowel. Poplar is the most available and what I used.
- Drill
- 3/4″ or 13/16″ spade bit. I used a 13/16″ just to make sure my dowel fit. It was a little loose, so maybe a 3/4″ would have been better?
- Rubber bands
- Pencil and measuring tape
- Elastic
- 3 yards of 46″ (W) Cute fabric (you’ll have a bit left over) 44″ would work too. (Best to pre-wash fabric before measuring.)
- Coordinating thread
- Sewing machine
Directions
Begin by stacking the molding in two’s, and rubber band each end so they stay put, doubling the area around where you want the hole. This will ensure your holes align in the same spot. Measure and mark 3″ from top on both stacks.

With your spade, drill your holes. Put a scrap piece of wood under the bottom of the stack so you don’t drill through the floor ;).

Once all holes are drilled, assemble the A-frame. You can loop a couple of rubber bands on the ends of the dowel to go under the holes in the molding. This will fill any gap and keep the dowel from slipping. You can also loop twine around the ends too.

 To make the tent cover, start with a 46 x86 piece of fabric. Hem a 1/2″ seam (doubled over) all the way around, so you end up with a 44×84″ fabric cover.
Cut 4- 4″ pieces of elastic and sew on each corner of the cover. These will loop over the bottoms of the molding and keep your fabric cover nice and tight. To assemble the cover, just drape over the dowel and secure the elastics around the bases of the A-Frame. Folds up nicely for storage too.


Happy camping!


